
 Jul 31,2026
You are running your thermoforming line at full speed. Parts are forming, cutting, and stacking. But when you inspect the output, you see thin spots, wrinkles between cavities, or parts that warp after cooling. The reject bin grows, and you are not sure where to start troubleshooting.
Thermoforming defects are rarely random. Each problem — webbing, thinning, warping, or poor detail — points to a specific root cause in the sheet, the mold, or the machine settings. The majority of thermoforming faults are caused by incorrect machine settings or poor mold design.
This guide covers the most common thermoforming problems, their root causes, and practical solutions to help you diagnose and fix issues on your line.
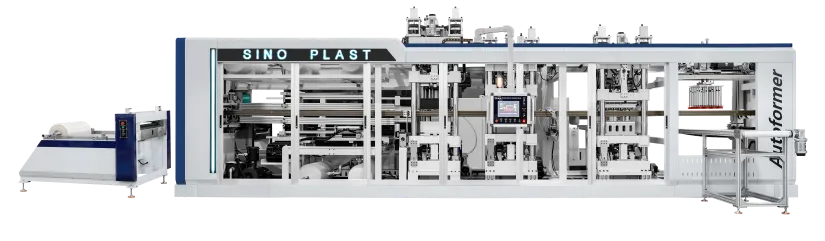
What it looks like: Thin membranes or folds of plastic that form between adjacent cavities, in deep corners, or along tight radii. The sheet material bridges across gaps instead of forming clean trim lanes.
Why it happens: Webbing typically stems from three issues: overheating of the plastic sheet, insufficient mold cavity spacing, or weak vacuum pressure. When the sheet is too hot, it becomes overly fluid and drapes across cavity gaps rather than pulling into the mold details. Cavity spacing that is too tight leaves insufficient material to form clean edges between parts.
How to fix it:
Lower the oven temperature gradually until webbing disappears
Increase cavity spacing in the mold design if possible
Check vacuum holes for blockages and clean them thoroughly
Reduce the forming speed to allow the sheet to draw more completely into each cavity
Prevention tip: During mold design, ensure adequate spacing between cavities. A well-designed mold with proper cavity pitch prevents the sheet from bridging across gaps. For existing tooling, adjusting the heating profile — cooler at the edges where bridging often occurs — can help.
Different thermoforming machine configurations handle cavity spacing differently. To see how forming area and station count affect part layout options, review the plastic thermoforming machine configurations overview.
What it looks like: Parts from edge cavities measure differently than those from the center. Some areas of the formed part are thinner than others, with weak spots that may fail in use.
Why it happens: Sheet edges lose heat faster than the center. Even with multi-zone heaters, the temperature across the sheet width is rarely perfectly uniform. This is one of the most common quality issues in thermoforming, and it is frequently misdiagnosed as a tooling or material problem when the root cause sits elsewhere. Non-uniform sheet heating, incorrect mold temperature, and improper vacuum or pressure distribution all contribute.
How to fix it:
Use multi-zone ovens to compensate for edge heat loss
Verify that heating elements are functioning correctly — broken heating tubes or uncalibrated thermostats create cold spots
Check mold temperature uniformity across all cavities
Adjust vacuum or pressure distribution to ensure even draw
Prevention tip: Modern thermoforming machines with independent temperature control zones allow finer adjustment across the sheet width. Machines with PLC control and touch screens enable precise setting and monitoring of temperature profiles. For deep-draw products, consider using plug assist to help distribute material more evenly during forming.
What it looks like: Formed parts twist, bow, or distort after removal from the mold. Parts that fit the mold perfectly come out misshapen.
Why it happens: Warpage occurs when cooling is uneven. If one area of the formed part cools faster than another, internal stresses develop, and the part distorts. Warpage can also result from residual stress in the sheet from the extrusion process. Problems during thermoforming can often be traced back to the extrusion process — every link in the production chain is important.
How to fix it:
Ensure even cooling across the entire formed part
Check that cooling fans or water-cooled molds are functioning correctly
Reduce the forming temperature if the sheet is being overheated
Allow longer cooling time before ejection
Verify that the sheet has been properly annealed during extrusion to minimize residual stress
Prevention tip: Even cooling prevents warping and ensures consistency. Machines with temperature-controlled molds and adjustable cooling systems provide better control. For materials prone to warpage, consider using a higher-strength resin or increasing corner radii in the mold design.
What it looks like: The formed part does not capture all the details of the mold surface. Sharp corners are rounded, textures are missing, or the part does not fully reach the mold walls.
Why it happens: Insufficient vacuum pressure, inadequate sheet temperature, or excessive plug speed can all prevent the sheet from conforming fully to the mold. If the sheet is not hot enough, it lacks the flexibility to flow into tight corners. If vacuum pressure is weak, the material does not get pulled against the mold surface.
How to fix it:
Increase sheet temperature gradually until full detail is achieved
Check vacuum system for leaks or blockages
Verify that the vacuum pump is delivering adequate pressure
Reduce plug assist speed to allow the sheet to stretch more gradually
Ensure the sheet thickness is appropriate for the part geometry — thin sheets may not have enough material to fill deep details
Prevention tip: For complex geometries, pressure thermoforming (using compressed air) can achieve deeper and more detailed parts than vacuum alone. Machines with servo-controlled forming stations provide more precise control over the forming sequence.
Customized thermoforming processes are needed to accommodate products with diverse geometries and multi-station machine configurations. For equipment selection suggestions of plastic thermoforming machines and applicable production scenario references, please refer to the Sinoplast Thermoforming Machine Application Overview.
What it looks like: The formed part surface has visible defects — scratches, bubbles, haze, or chill marks. These are cosmetic defects that can cause product rejection, especially in food packaging where appearance matters.
Why it happens: Surface defects have multiple possible causes. Bubbles or haze can result from moisture in the sheet — when moisture is present during heating, micro-steam forms and creates surface cloudiness. Scratches can come from handling or from debris on the mold surface. Chill marks occur when the heated sheet contacts a cold surface too quickly, leaving visible marks.
How to fix it:
For moisture-related defects: dry the sheet thoroughly before forming — PET is particularly sensitive
Clean mold surfaces regularly to prevent scratches and debris marks
Check that the sheet does not contact the heating element during heating — this can damage the element and create surface defects
For chill marks: increase the mold temperature or adjust the forming speed
Prevention tip: Material storage conditions matter. Certain thermoforming polymers can absorb moisture from the air over time. Store sheet in a dry environment and use pre-drying equipment for moisture-sensitive materials like PET.
What it looks like: Formed parts stick to the mold surface and cannot be ejected cleanly. This causes cycle interruptions and can damage parts.
Why it happens: Parts can stick due to excessive mold temperature, insufficient draft angle, or surface adhesion between the plastic and the mold material. If the mold is too hot, the plastic remains soft and grips the mold surface.
How to fix it:
Reduce mold temperature gradually
Check that the mold has adequate draft angles for ejection
Apply or check the mold release agent
Verify that the cooling system is functioning properly — parts that are not fully cooled may stick
Inspect mold surfaces for damage or roughness that could cause adhesion
Prevention tip: Mold design should include adequate draft angles for easy part release. Machines with four-guide column structures maintain stable mold alignment, reducing the risk of part sticking due to misalignment.
When problems arise, a systematic approach helps identify the root cause faster.
Does the problem affect all cavities or only some?
Does it occur consistently or intermittently?
When did it start — after a material change, mold change, or maintenance?
Verify heating times, temperatures, controls, and gauges
Incorrect heating is the most common cause of thermoforming problems
Check that all heating elements are working and calibrated
Is the sheet within specification for thickness and width?
Has the material been stored correctly?
For moisture-sensitive materials, has the sheet been properly dried?
Check for damage, wear, or debris on mold surfaces
Verify vacuum holes are clear
Confirm mold temperature is uniform across all cavities
Compare current settings to known-good recipes
Has anything been changed recently?
Use the machine's parameter save function to recall proven settings
You now have a framework for diagnosing and fixing the most common thermoforming problems:
| Problem | Primary Causes | First Solution to Try |
|---|---|---|
| Webbing | Overheating, tight cavity spacing | Lower oven temperature |
| Uneven wall thickness | Non-uniform heating, mold temperature variation | Check multi-zone heaters |
| Warpage | Uneven cooling, residual stress | Verify cooling uniformity |
| Poor detail | Insufficient vacuum, low sheet temperature | Increase forming temperature |
| Surface defects | Moisture, debris, chill marks | Dry sheet; clean mold |
| Sticking | High mold temperature, insufficient draft | Reduce mold temperature |
The key to reducing rejects is systematic troubleshooting — identify the defect, trace it to its root cause, and implement a targeted solution. Many thermoforming problems share common root causes: incorrect heating, poor temperature control, or mold issues. Addressing these fundamentals resolves most quality issues.
Once you have identified and corrected the defects affecting your line, comparing specific machine features — temperature control systems, servo configurations, and quick-change tooling — becomes the logical next step for selecting equipment that supports consistent, high-quality production.
Three-Station vs Four-Station Thermoforming: Total Cost of Ownership
How to Choose the Right Plastic Thermoforming Machine in 2025
Moisture Control in Thermoforming: Drying Requirements for PET and Other Hygroscopic Materials
Preventive Maintenance Checklist for Thermoforming Lines
Sep 01,2026
Aug 27,2026
We are a professional plastic machinery provider in China.